Quest 3 Motion Controller States
The MotionController offers a way to stream the current pose, button and trackpad states of the Quest 3 motion controller to the python side. To use this mixed reality (XR) feature, you need to setup vuer behind a SSL proxy. I usually use ngrok, which is a paid service. You can also use local tunnel, which is free.
Motion Controller API
Getting the motion controller states: You can get the full pose of the motion controllers by listening to the CONTROLLER_MOVE event. You can add flags left and right to specify which side you want to track.
Haptic Feedback via pulsing: You can pulse the gamepad using the following keys: pulseLeftStrength, pulseLeftDuration, puseLeftHash. The pulseLeftStrength is a number between 0 and 1, and the pulseLeftDuration is the duration of the pulse in milliseconds. The puseLeftHash is a unique identifier for the pulse, that once changed, will trigger a new pulse.
Example Script: Haptic Trigger Pull
The example below shows how to trigger a haptic pulse to reflect the trigger pull value. The user should experience a stronger vibration when the trigger is pulled further.
The returned data looks like the following:
Button and Trackpad States
The webXR Motion Controller API uses the XRInputSource's gamepad.
For detailed API, refer to the link
attribute to get the button and trackpad states. The following code snippet shows how to extract the button and trackpad states from the gamepad:
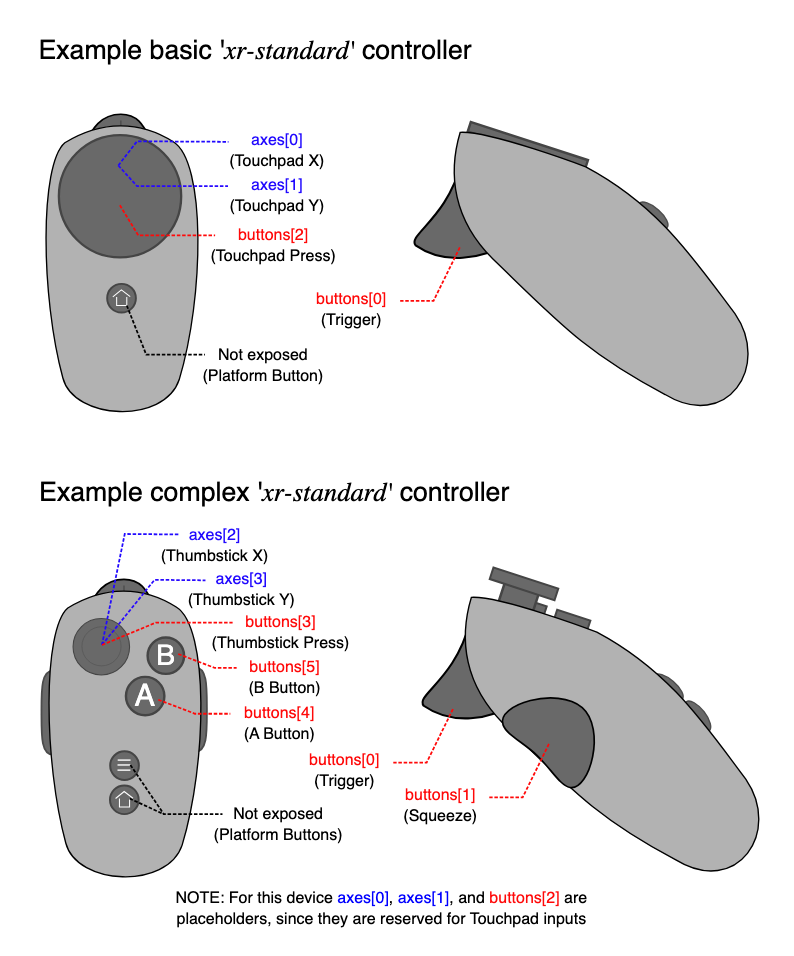
| Buttons | xr-standard Mapping | Required |
|---|---|---|
| buttons[0] | Primary trigger | Yes |
| buttons[1] | Primary squeeze button | No |
| buttons[2] | Primary touchpad | No |
| buttons[3] | Primary thumbstick | No |
| Axes | xr-standard Mapping | Required |
|---|---|---|
| axes[0] | Primary touchpad X | No |
| axes[1] | Primary touchpad Y | No |
| axes[2] | Primary thumbstick X | No |
| axes[3] | Primary thumbstick Y | No |
Matrix format
All 4x4 transform matrices used in WebGL are stored in 16-element Float32Arrays. The values are stored in the array in column-major order; that is, each column is written into the array top-down before moving to the next column to the right and writing it into the array. Therefore, for the array [a0, a1, a2, …, a13, a14, a15], the matrix looks like this:
For details, refer to the MDN documentation on XR Rigid Body Transformation